Why Perfect Prep Makes All the Difference
Moisturize before self tan - it's the one step that separates a flawless, natural-looking glow from a patchy disaster. The answer is yes, you absolutely should moisturize specific areas before applying self-tanner, but timing and technique matter more than you think.
Quick Answer for Perfect Pre-Tan Prep:
- When: 2-3 hours before tanning (never immediately before)
- Where: Focus on dry areas - elbows, knees, ankles, hands, feet
- What: Light, oil-free moisturizer as a barrier cream
- Why: Prevents over-absorption and dark patches on dry skin
We've all been there - excited for that sun-kissed glow, only to wake up looking like we dipped our elbows in chocolate. The truth is, your skin's hydration level directly impacts how self-tanner develops. Dry areas act like sponges, soaking up extra color and leaving you with those telltale dark patches that scream "fake tan."
The science is simple: self-tanning ingredients (like DHA) react with dead skin cells on your skin's surface. When those cells are dry and rough, they grab onto more product. But when you create a smooth, lightly moisturized base, the tanner glides on evenly for that natural-looking result you're after.
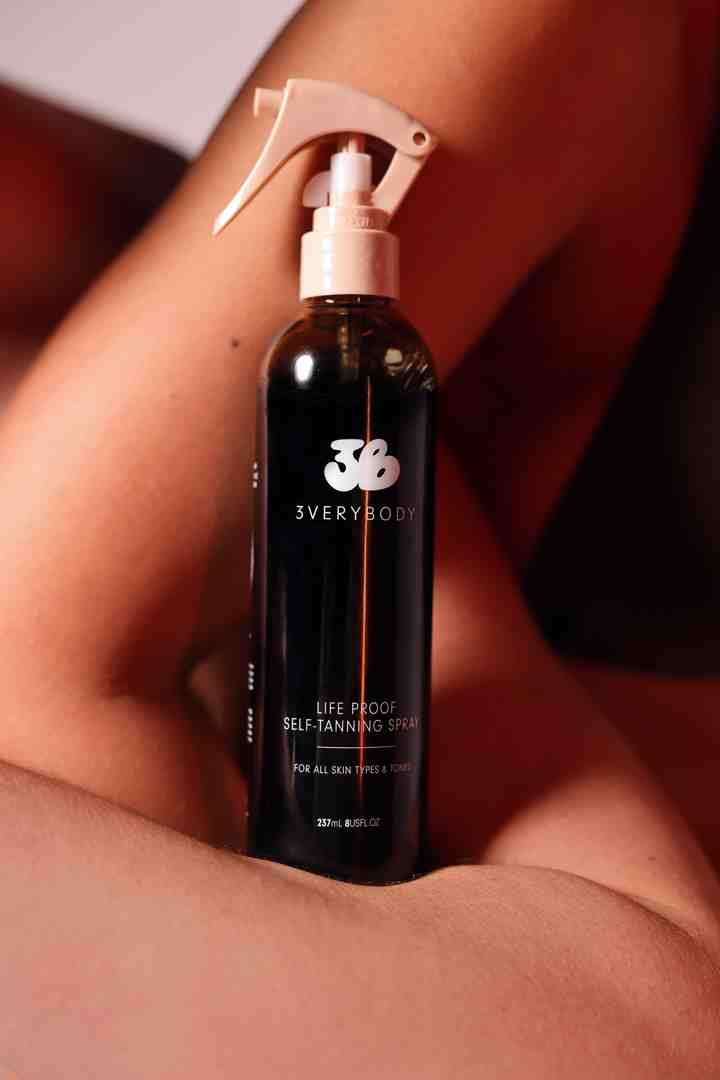
I'm Emmybre, founder of 3VERYBODY, and after a decade of testing nearly every self-tanner on the market, I learned that knowing how to moisturize before self tan is what separates amateur hour from professional-level results. Through countless formula tests in my apartment kitchen and working with chemists, I've cracked the code on streak-free, sweat-resistant tanning for every skin tone.

Why Moisturizing is Your Secret Weapon for a Flawless Tan

Here's the deal: moisturize before self tan application isn't optional - it's your insurance policy against a patchy disaster. Think of it as creating the perfect canvas for your glow.
Your skin is smarter than you think. When it's dry, it acts like a thirsty sponge, grabbing onto every drop of self-tanner it can find. The science behind this is pretty straightforward - self-tanners work by reacting with amino acids in your skin's top layer. When that layer is parched and rough, it soaks up way more product than it should.
Dry skin absorbs more color, plain and simple. Those rough patches on your elbows, knees, and ankles? They're tanner magnets. Without proper hydration, these spots turn into dark, telltale patches that scream "fake tan from a mile away."
But when you moisturize before self tan application, you're creating a smooth, even surface. The tanner glides on beautifully instead of clinging to dry spots. Your color develops evenly, looks natural, and lasts longer because hydrated skin holds onto color better.
I learned this the hard way during my early formula testing days. Nothing's more humbling than walking into a meeting with chocolate-colored elbows because you rushed the prep work. Now I never skip this step, and neither should you.
Want the full science breakdown? Check out our guide on how do self tanners work.
What Happens if You Skip Moisturizer?
Skip this step, and you're basically playing tanning roulette. Here's what usually goes wrong:
Blotchy, uneven results are almost guaranteed. Your tanner will grab onto every dry patch, creating a patchwork effect that's impossible to hide. Orange hands and feet become your unwanted accessories because these areas are naturally drier and over-absorb product.
Dark knees and elbows are the classic giveaway of skipped prep. These spots are thicker and drier, so they drink up tanner like it's their job. The result? Muddy-looking patches that stand out against your otherwise gorgeous glow.
Then comes the uneven, flaky fade-out. Dry skin sheds faster, so your beautiful tan starts peeling off in patches instead of fading gracefully. You'll waste time trying to fix the mess, and honestly, you'll waste your amazing product too.
Trust me, proper prep saves you from all this drama. For more ways to avoid common mistakes, check out our Tips for Avoiding Common Self-Tanning Mistakes.
The Pre-Tan Playbook: When and How to Moisturize Before Self Tan
Getting your moisturize before self tan timing right is honestly the difference between looking like a bronze goddess and looking like you wrestled with a bottle of fake tan and lost. Trust me, I learned this the hard way during my early formula-testing days when I'd rush through prep and end up with elbows that looked like I'd been finger-painting with chocolate.
Timing is everything when it comes to pre-tan hydration. Think of it as a two-part process: your daily hydration habit sets the foundation, while your tan day prep steps put the finishing touches on your canvas.
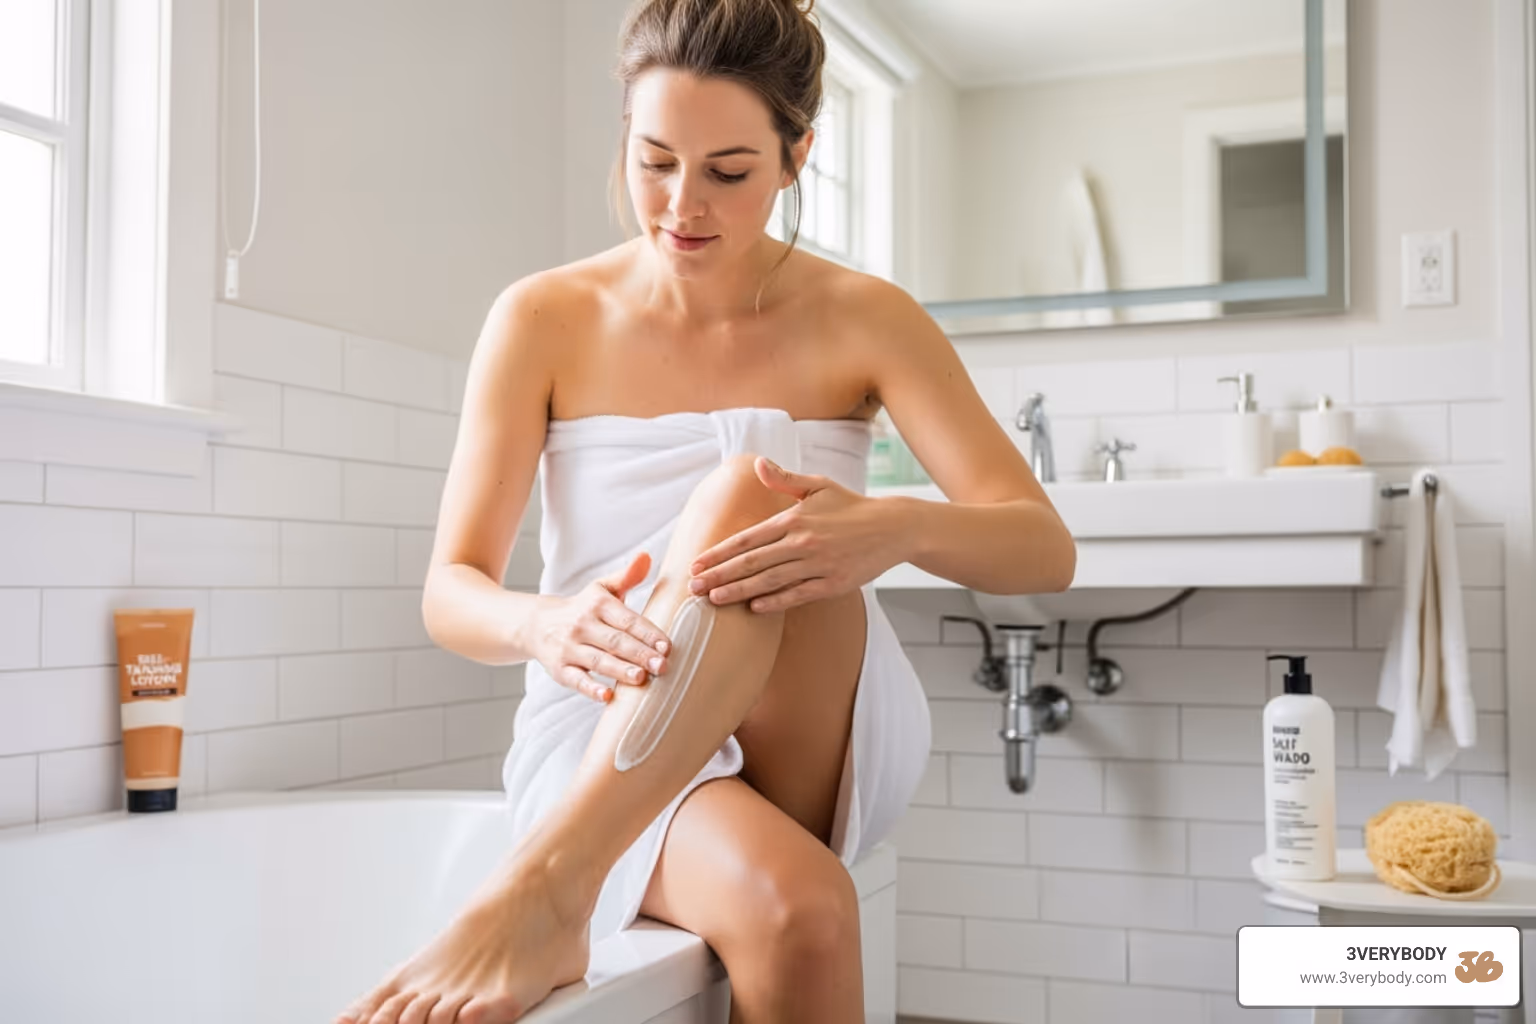
In the week leading up to your tanning session, make moisturizing a daily ritual. This keeps your skin generally well-conditioned and creates that healthy foundation we're after. But on tan day itself, you'll need to be more strategic. The goal isn't to drench your skin in lotion - it's to create a subtle barrier on those trouble spots that love to soak up extra color.
Your application technique for barrier cream should be targeted and light. We're talking about those notorious dry zones: elbows, knees, ankles, hands, and feet. A gentle, even layer on these areas helps prevent them from acting like color-hungry sponges.
The Golden Rule: How Long to Wait After Moisturizing
Here's where most people mess up their tanning game: they think more moisturizer right before tanning equals better results. Wrong! Full absorption is key to avoiding a streaky disaster.
The magic number? The 1-3 hour window after moisturizing your entire body. This gives your skin time to drink up all that hydration without leaving a slippery residue that'll interfere with your self-tanner. Why waiting prevents streaks is simple science - when your skin is still tacky from lotion, your tanner can't grab evenly onto the surface.
Think about it this way: you don't want to create a product barrier between your skin and the tanner. If there's still moisture sitting on top of your skin, the DHA can't properly react with those dead skin cells to create that beautiful bronze color.
This timing question comes up a lot, especially for facial tanning. A user asks about timing for face tanning, and the answer is always the same: moisturize in advance, let it absorb completely, then tan.
How to Prep and Moisturize Before Self Tan Application
Once you've waited that crucial 1-3 hours for your full-body moisturizer to absorb, it's time for the final prep step. This is where we focus on dry areas with surgical precision.
A light layer is all you need for this barrier step. We're not trying to deeply hydrate anymore - we're creating a subtle buffer zone. Think pea-sized amounts for each trouble spot, not the generous application you'd use for your regular skincare routine.
Your target spots: elbows, knees, ankles, hands, feet are the usual suspects, but pay attention to your own skin's quirks. Some people need extra attention on their wrists, knuckles, or even around their hairline. The key is knowing your skin and where it tends to grab extra color.
For your elbows and knees, focus on those bony areas and natural creases where skin tends to be thicker and drier. Your ankles and the tops of your feet are prime real estate for over-absorption, so don't skip these spots. And with your hands, just a tiny bit around the knuckles and cuticles will save you from that telltale "fake tan hands" look.
This targeted approach prevents those areas from drinking up too much tanner while still allowing for beautiful, even color development. It's the difference between a professional-looking glow and obvious self-tanner mistakes.
For the complete breakdown on getting your skin perfectly prepped, check out our guide on Best Practices for Prepping Your Skin Before Applying Self-Tanner.
Choosing Your Hydration Hero: The Best (and Worst) Moisturizers
When you're preparing to moisturize before self tan, not all moisturizers are created equal. I learned this the hard way after a particularly disastrous tanning session where I grabbed the first lotion I could find—a heavy, oil-based body butter that left me looking like a patchy leopard. The type of moisturizer you choose can make or break your tan's outcome.
The secret is understanding which ingredients work with your self-tanner and which ones work against it. Here’s a quick cheat sheet:
| Tan-Friendly Ingredients | Tan-Sabotaging Ingredients |
|---|---|
| Hyaluronic Acid | Mineral Oil |
| Glycerin | Heavy Fragrances |
| Aloe Vera | Alcohol |
| Shea Butter | Exfoliating Acids (AHA/BHA) |
Tan-friendly ingredients like hyaluronic acid and glycerin provide hydration without interfering with the tanning process, creating that smooth canvas we're after. On the flip side, tan-sabotaging ingredients like mineral oil or alcohol can ruin your glow before you even start by creating a barrier or drying out your skin.
Reading ingredient lists might seem tedious, but it's worth those extra few seconds. When in doubt, remember this: simple is better. A basic, fragrance-free moisturizer with minimal ingredients will almost always outperform a fancy formula loaded with unknowns.
What to Look For in a Pre-Tan Moisturizer
The perfect pre-tan moisturizer acts like a primer for your skin. After testing dozens of products (seriously, my bathroom looked like a moisturizer graveyard), here's what actually works:
Oil-free formulas are non-negotiable. Oils create a slippery barrier that prevents your self-tanner from grabbing evenly onto your skin. They can also break down DHA, the active ingredient that creates your tan, making your color fade faster than you'd like.
Water-based lotions are your best friend here. They absorb quickly, provide the hydration your skin needs, and don't leave behind any residue that could interfere with your tan development. Look for that lightweight, fast-absorbing feel—your skin should feel smooth and supple, never sticky or heavy.
Fragrance-free options might not smell as lovely, but they're much safer for tanning. Some fragrances can cause irritation or even react with your self-tanner, potentially turning your beautiful bronze into an unexpected shade.
The ingredients that really shine for pre-tan prep include hyaluronic acid (holds up to 1,000 times its weight in water), glycerin (draws moisture from the air into your skin), aloe vera (soothes and hydrates), and shea butter (provides lasting moisture without heaviness).
If you have sensitive or eczema-prone skin, choosing the right moisturizer becomes even more crucial. We always recommend patch testing and sticking to hypoallergenic formulas. For more guidance on products that work well with reactive skin, check out our guide on what is the best self-tanner for sensitive or eczema prone skin.
Can You Mix Self-Tanner with Moisturizer?
This question comes up constantly, and I get why—it seems like a logical shortcut. The short answer is yes, you can mix self-tanner with moisturizer, but there's a right way and a wrong way to do it.
Mixing essentially creates a gradual tanner by diluting the color intensity. This works beautifully for maintenance tanning—those touch-ups between full applications where you want just a hint of color. It's also perfect for creating a subtle glow on areas like your face, hands, or feet where you want less intensity.
But here's the thing: mixing isn't ideal for your main tanning event. For the deepest, most even color, apply your self-tanner directly to properly prepped skin using a mitt. Save the mixing technique for those delicate areas or maintenance sessions.
How to mix properly: Work in small batches for each application. Put a dollop of moisturizer in your palm, add just a drop or two of self-tanner, mix quickly with your finger, and apply immediately. This gives you complete control over the intensity and prevents waste.
At 3VERYBODY, we've actually designed our formulas to be naturally moisturizing, so you get that hydration boost built right into your tan. No mixing required—just smooth, even color that nourishes your skin while it develops.
Beyond the Prep: Moisturizing After Tanning to Extend Your Glow

Here's the thing most people don't realize: your self-tan care routine doesn't end when you rinse off that guide color. What you do in the days after is what separates a tan that lasts beautifully for over a week from one that starts looking patchy by day three.
I learned this the hard way during my early tanning experiments. I'd get this gorgeous, even glow, then completely neglect my skin afterward. Within a few days, I looked like a molting snake - definitely not the vibe I was going for.
Moisturizing after tanning is your secret weapon for locking in color. When your skin stays hydrated, it holds onto that beautiful bronze longer and fades more naturally. Think about it: your tan lives in your skin's top layer. When that layer gets dry and flaky, your tan disappears right along with it.
Hydrated skin is happy skin, and happy skin keeps your color looking fresh. This consistent post-tan care is what makes your glow last longer and fade evenly instead of in those telltale patchy spots that scream "fake tan."
The difference is honestly night and day. Clients who follow our post-tan moisturizing routine regularly get 8-10 days of gorgeous color versus the 4-5 days you might expect without proper aftercare.
For more insights on achieving that perfect sunless glow from start to finish, check out our guide on How to Achieve a Natural-Looking Tan Without the Sun.
When and How to Moisturize After Tanning
Timing is everything when it comes to post-tan moisturizing. Get it wrong, and you could actually strip away the color you worked so hard to achieve.
Wait for the first rinse before applying any moisturizer. After your self-tanner has developed for the recommended time (usually 4-8 hours), take that initial lukewarm shower to remove the guide color. Keep it quick - about 45 seconds with just water or a very gentle, sulfate-free body wash.
Here's the crucial part: don't moisturize for the first 24 hours after tanning. I know it sounds counterintuitive, but your tan is still developing during this time. Any lotions, oils, or products can interfere with the DHA reaction and leave you with uneven results.
Once you hit that 24-hour mark, it's time to moisturize daily. This is when you want to establish a routine that'll keep your color looking fresh. Apply a gentle, hydrating moisturizer every morning after your shower, and your tan will thank you for it.
Pat your skin dry instead of rubbing - this simple switch prevents unnecessary friction that can cause your tan to fade unevenly. Use a soft towel and gentle patting motions, especially on areas where your tan tends to fade first like your knees and elbows.
When choosing your post-tan moisturizer, stick with simple, hydrating formulas just like you did before tanning. Look for ingredients like hyaluronic acid, glycerin, and aloe vera. Avoid oil-based products, harsh fragrances, or anything with exfoliating acids - these can cause your beautiful tan to fade faster than you'd like.
Use gentle, sulfate-free body wash for all your showers moving forward. Harsh cleansers are tan killers, so investing in a mild formula will help preserve your glow for days longer.
Frequently Asked Questions about Tanning Prep
Getting your pre-tan routine right can feel overwhelming at first, but honestly, once you nail the basics, it becomes second nature. These are the questions I hear most often from our 3VERYBODY community - and trust me, I've made every mistake in the book myself!
Should I exfoliate before I moisturize?
Yes, always! This is non-negotiable if you want that smooth, even glow. Exfoliation comes first in your pre-tanning timeline, ideally 24 hours before you plan to tan.
Here's why this order matters: exfoliating removes all those dead skin cells, leftover product buildup, and any remnants of your old tan. Think of it as creating a fresh canvas for your self-tanner to work with. When you skip this step, your tan clings to rough, flaky patches instead of developing evenly.
But there's more to it than just smoothness. Exfoliation actually removes proteins in your skin's outer layer that can interfere with DHA (the tanning ingredient) doing its job properly. Without these barriers, you get a more natural-looking, even color that develops beautifully.
The timing is crucial too. That 24-hour window gives your skin time to calm down after exfoliation, so you're not applying self-tanner to irritated or overly sensitive skin.
Want to dive deeper into why this step makes such a difference? Check out our guide on The Importance of Exfoliation in Self-Tanning Routines.
Can I shave right before or after self-tanning?
Short answer: shave at least 24 hours before your tan, never after. I learned this the hard way when I shaved my legs the morning after a beautiful tan application - hello, streaky disaster!
When you shave, you're essentially exfoliating your skin. Those tiny nicks and scrapes (even ones you can't see) leave your pores open and your skin sensitive. If you apply self-tanner right after shaving, it can seep into those open pores and create tiny dark dots all over your legs. Not cute.
Shaving after applying self-tanner is even worse. You'll literally scrape away strips of color, leaving you with uneven, patchy results. It's like taking sandpaper to a fresh paint job - the tan comes off in streaks and you're left starting over.
Give yourself that 24-hour buffer after hair removal. Your skin needs time to settle down, your pores need to close, and you need to avoid any irritation that could affect how your tan develops.
How do I fix a patchy tan if I forgot to moisturize?
We've all been there - you get excited about tanning and skip the moisturize before self tan step, only to wake up looking like you dipped your elbows in cocoa powder. Don't panic! There are ways to fix this.
For dark patches on elbows, knees, or ankles, try gentle exfoliation first. Use a soft washcloth with a mild body scrub, focusing only on the overly dark areas. Work in small circles to gradually blend the color. Go easy though - aggressive scrubbing will just create more uneven spots.
A slice of fresh lemon can be surprisingly effective for lightening stubborn dark patches. The natural acids help break down the DHA. Rub the lemon directly on the area, let it sit for 5-10 minutes, then rinse off. Just make sure to moisturize afterward since lemon can be drying.
For bigger mistakes or major streaking, a dedicated tan remover is your best friend. These products are specifically formulated to break down self-tanner. Apply generously to clean, dry skin, wait the recommended time (usually 5-10 minutes), then rinse while gently scrubbing with a tanning mitt.
If you have lighter patches instead of dark ones, you can carefully build up those areas with a gradual tanning lotion over a few days. Apply just a thin layer to the lighter spots and blend well at the edges.
The key is patience - don't try to fix everything at once. Make small adjustments over a couple of days rather than going nuclear with harsh scrubs. For more detailed tips on avoiding these issues altogether, read our guide on How can I avoid streaks or patchiness when applying self tanner.
Your Flawless Glow is Just a Step Away
You've got this! The secret to a gorgeous, natural-looking tan really comes down to one simple step: knowing how to moisturize before self tan. It's not rocket science, but it makes all the difference between looking like you just returned from a tropical vacation versus looking like you wrestled with a bottle of orange juice.
Let's recap the key steps that'll transform your tanning game. Exfoliate 24 hours before to create that smooth canvas. Moisturize your dry spots 2-3 hours before applying your self-tanner, focusing on those notorious trouble areas like elbows, knees, and ankles. Then apply your self-tanner with a mitt for even coverage, and moisturize daily afterward to keep that glow going strong.
The confidence that comes with a flawless tan is best. When you nail the prep work, you'll step out knowing your glow looks completely natural. No more hiding your elbows or worrying about streaky ankles. Just pure, radiant confidence.
Here's the thing - it really is easier than you think when you have the right approach and quality products. I've spent years perfecting formulas that work with your skin, not against it. Our self-tanners are non-sticky, smell amazing, and work beautifully on every skin tone from the palest to the deepest. No orange undertones, no weird chemical smell, and definitely no patchy disasters.
Ready to experience what a truly flawless tan feels like? Our 3VERYBODY Kit has everything you need - the self-tanner, application mitt, and detailed instructions to guide you through every step. We've taken all the guesswork out of getting gorgeous.
Get your complete tanning solution with the 3VERYBODY Kit and find why thousands of women trust us for their perfect glow.