The Real Reason Your Self-Tanner Streaks (And How to Fix It for Good)
Getting a self tanner without streaks is simpler than most people think — once you know what's actually causing the problem.
Here's the short answer if you need it fast:
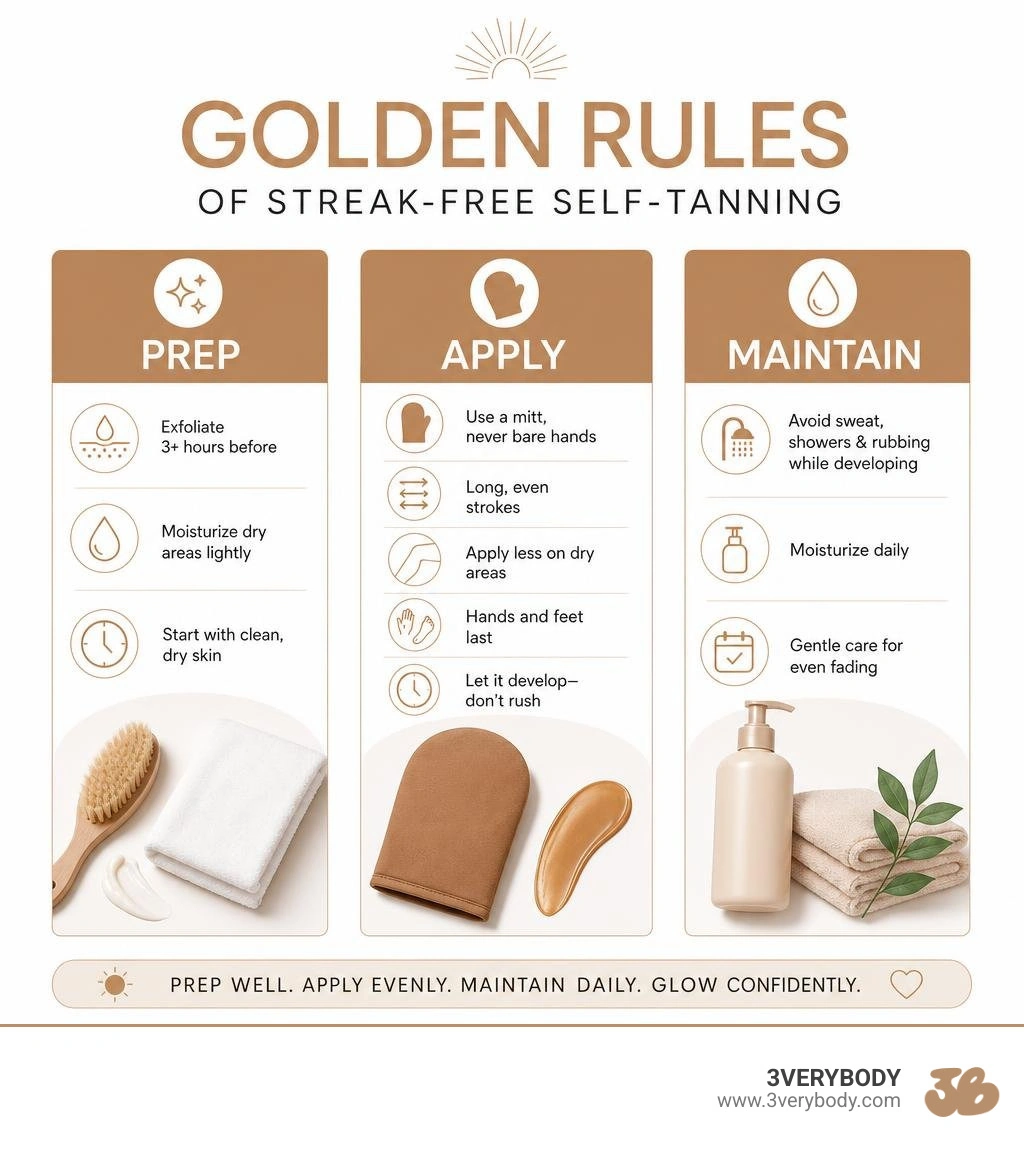
- Exfoliate with an oil-free scrub at least 3 hours before applying.
- Use a mitt — never bare hands — to spread product in long, even strokes.
- Apply less on dry areas like knees, elbows, and ankles.
- Leave hands and feet for last, blending with the clean side of the mitt.
- Don't sweat, shower, or rub the skin while the tan is developing.
- Moisturize daily to help the tan fade evenly.
That's really it. Most streaks come down to skipping one of those steps — not the product itself.
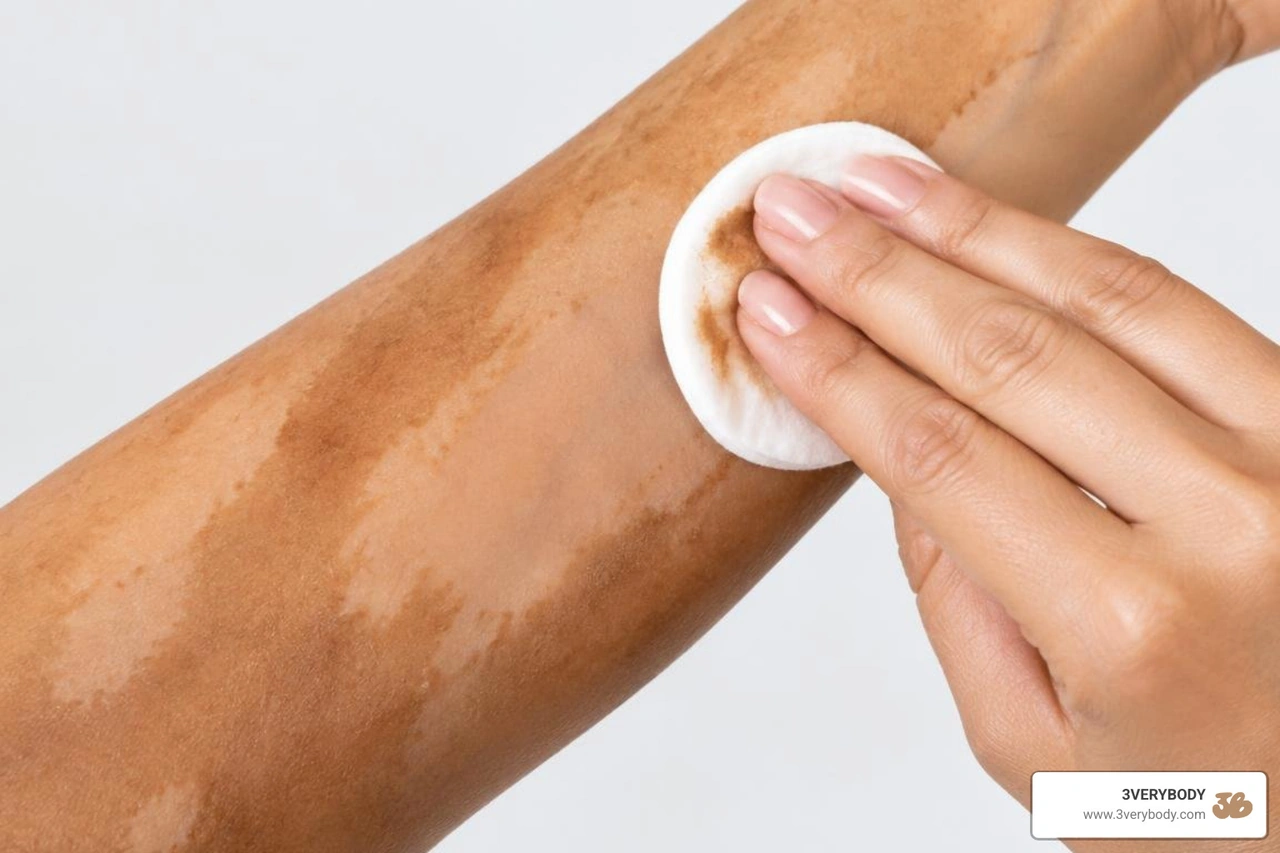
But if you've ever peeled off your clothes to find tiger stripes across your legs, you know the frustration is real. Dry patches, uneven blending, rushing the process — they all add up. The good news? Streaky tans are almost always preventable, and fixable when they do happen.
I'm Emmy Bre, founder of 3VERYBODY, and after a decade of testing nearly every self-tanner on the market before developing our own self tanner without streaks from scratch, I've made every mistake there is to make — so you don't have to. In this guide, I'll walk you through exactly how to get an even, natural-looking tan at home, step by step.
Glossary for self tanner without streaks:
- how to prep skin
- best self tanner kit (Note: Adjusted to match standard formatting)
- self tanner no smell
Why Most Tans Streak (And How to Choose a Self-Tanner)
Most sunless tanners rely on DHA (dihydroxyacetone), a plant-derived sugar that reacts with the amino acids in the dead cells of your skin's outer layer to darken it.
When you see uneven patches or orange tones, it is rarely a chemical flaw. Instead, it usually happens because of overapplication, applying to dry skin where the product pools, poor prep, or choosing a shade that is simply too deep for your starting skin tone.
When you are looking for Streak Free Self Tanners | Sephora , you will find everything from thick lotions to heavy, whipped formulas. At 3VERYBODY, we made a conscious choice to skip the heavy formulas entirely. A thinner, water-light layer blends cleaner, dries faster, and looks natural from very fair to deep skin.
Here is how water-light formulas compare to traditional heavy formulas:
| Feature | Water-Light Formulas (like Life Proof Tan) | Traditional Heavy Formulas |
|---|---|---|
| Application Weight | Ultra-lightweight, liquid mist layer | Heavy, aerated layer |
| Drying Time | Touch-dry in a few minutes | Often remains sticky or tacky for hours |
| Streak Risk | Low (glides easily and absorbs evenly) | Medium (can build up in dry patches) |
| Transfer Risk | Highly transfer-resistant | High potential to stain clothing and sheets |
| Skin Feel | Breathable, hydrating feel | Can feel heavy or drying over time |
The Prep Work: Setting the Stage for an Even Glow
If your skin is dry, flaky, or has leftover lotion on it, your self-tanner will grab onto those areas and create dark patches.
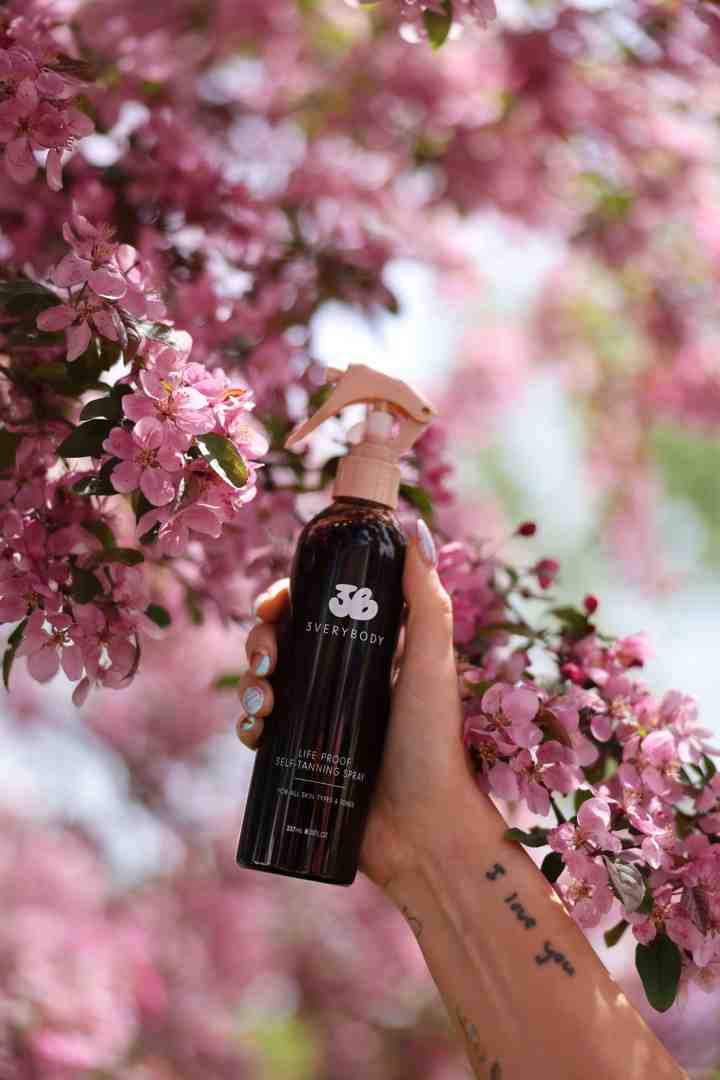
To set yourself up for success, follow these essential prep steps:
- Exfoliate properly: Use an oil-free scrub or an exfoliating mitt. Oils from heavy body scrubs leave a barrier on your skin that blocks the tanner from absorbing. If you are wondering, Should You Exfoliate Before Using Self-Tanner, the answer is a resounding yes. Check out our guide on How to Exfoliate Properly to get it right.
- Shave early: Shave or wax at least 3 hours before you tan. This gives your pores time to close up so the tanner does not settle into tiny dark dots.
- Target dry spots: Apply a tiny amount of lightweight, oil-free moisturizer to your elbows, knees, ankles, and wrists right before tanning. This acts as a gentle buffer.
- Clean skin is key: Ensure your skin is completely free of deodorant, perfume, and makeup before you begin.
For a complete breakdown of this phase, read our guide on Best Practices for Prepping Your Skin Before Applying Self-Tanner.
Step-by-Step: How to Apply Your Self-Tanner Without Streaks
Once your skin is clean, dry, and prepped, it is time to apply. Working in sections keeps you from missing spots or letting the product dry before it is fully blended.
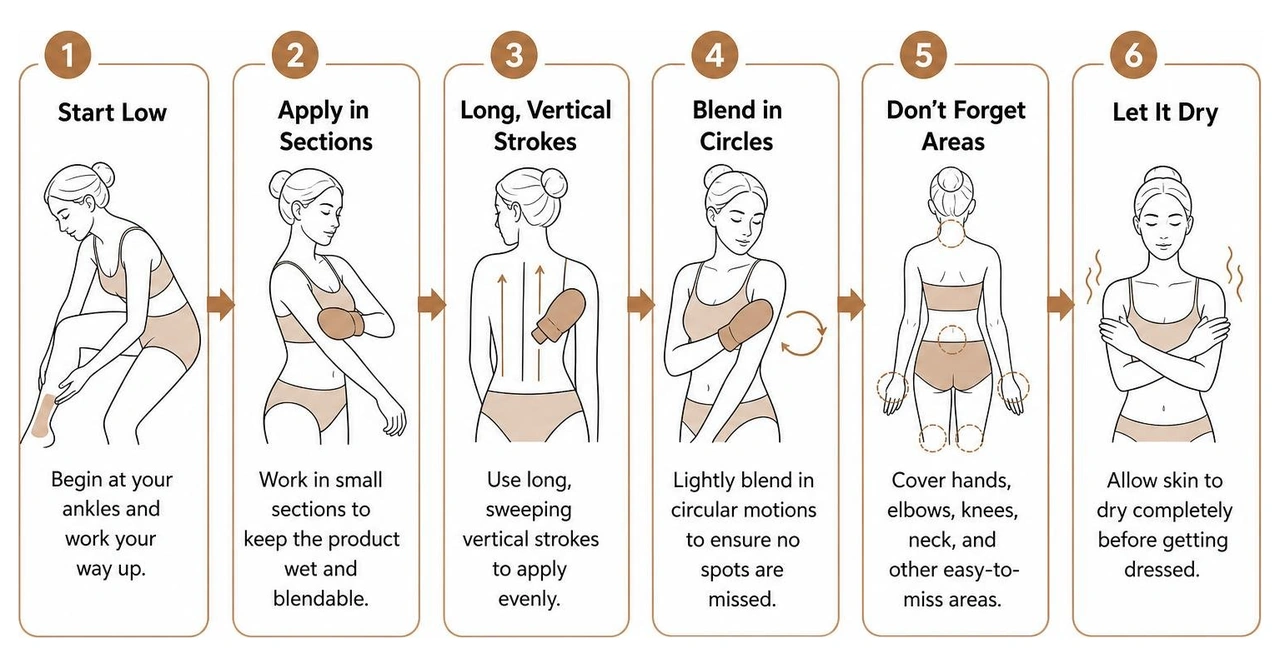
Always start from your ankles and work your way up. This prevents you from creating crease lines in your stomach or arms when you bend over. Apply the product using long, sweeping vertical strokes, and then lightly blend in circular motions to make sure no spots are missed. You can find more details on this technique in our guide on how to Self-Tan Without Streaks.
Master The Mitt for an Even Application
Never use your bare hands to apply self-tanner. The palms of your hands absorb product instantly, leaving you with stained fingers.
Instead, use a high-quality, double-sided applicator like The Mitt. Spritz our Life Proof Tan Tinted Tanning Water directly onto the mitt rather than spraying it straight onto your body. This gives you complete control over where the liquid goes. Smooth the mitt over your skin in long, overlapping passes.
Our Life Proof Tan is sweat-resistant, transfer-resistant, and quick-drying, meaning you can get dressed without that heavy, sticky feeling. To learn more about selecting the right tool, read our Tanning Mitt Guide 2026 and check out our custom Streak-Free Tan Applicator Mitt and Tanning Mitt Applicator pages.
Customizing Your Glow with Tanning Drops
For your face, neck, and chest, or if you prefer a subtle, buildable glow, Tanning Drops are your best friend.
Our Tanning Drops are designed to be mixed directly into your favorite daily face or body moisturizer. They are lightweight, quick-drying, and enriched with rosehip oil and cucumber extract to keep your skin feeling hydrated.
To use them, simply add 2 to 6 drops to a dime-sized amount of moisturizer in your palm, mix them together, and apply evenly to your face and neck, blending down into your hairline and collarbones. Remember to wash your hands immediately afterward! For a detailed walkthrough, view our guide on How to Apply Self-Tanning Drops.
Post-Tan Care: Drying, Rinsing, and Maintenance
What you do while your tan is developing is just as important as the application itself.
- Let it dry: Our formulas are touch-dry in a few minutes, but wait at least 10 minutes before putting on loose, dark clothing. Avoid tight bras, leggings, or denim while the color develops.
- Watch the water: Avoid washing your hands, doing dishes, working out, or getting caught in the rain for the first 4 to 8 hours.
- The sweat trick: If you live in a warm climate or sweat easily, dust a little baby powder into high-friction areas like the inner elbows, back of the knees, and underarms to absorb moisture and reduce friction.
- The first rinse: When your development time is up, hop in the shower for a quick, lukewarm rinse. Do not use harsh soaps, scrubs, or loofahs. Just let the water run clear, then gently pat your skin dry with a towel.
For more post-care wisdom, read How to Avoid Streaks or Patchiness When Applying Self-Tanner and discover the benefits of a Non-Streaky Self-Tanner.
Troubleshooting and Special Skin Considerations
Even with the best preparation, skin can be unpredictable. Here is how to handle specific skin concerns and quick fixes.
Finding a Self-Tanner for Fair Skin
If you have very fair skin, the fear of looking orange or unnatural is completely valid. The key is to avoid ultra-dark, high-DHA formulas right out of the gate.
Instead, opt for a buildable, gradual approach. Mixing our Tanning Drops with your daily lotion allows you to control the depth of your color, letting you build a subtle, natural-looking warmth over a few days. For more tips on managing pale skin tones, check out The 8 Best Self-Tanners for Fair Skin of 2026, Tested - Byrdie .
How to Fix Streaks and Patchy Spots
If you wake up and notice a streak or a spot that is too dark, do not panic, and please do not start aggressively scrubbing your skin with harsh chemicals.
Instead, try these gentle methods to blend it out:
- The oil method: Apply a small amount of body oil to the dark spot, let it sit for 10 minutes to soften the tanned cells, and then gently buff the area with a damp washcloth or an exfoliating mitt.
- Take a warm bath: Soaking in a warm bath for 15 to 20 minutes naturally softens the outer layer of your skin, making it much easier to gently blend away uneven areas.
- Moisturize: Sometimes, what looks like a streak is actually just a dry patch. Apply a generous layer of daily moisturizer to help even out the appearance of the tan.
For more real-world troubleshooting tips, you can read My Favorite Self Tanners | No Streaks + Easy To Apply At Home! .
Frequently Asked Questions about Streak-Free Tanning
How long should I wait to shower after applying self-tanner?
For our Life Proof Tan, we recommend waiting 6 to 8 hours for the color to fully develop. Many people prefer to apply it before bed and rinse with lukewarm water in the morning.
Can I use body self-tanner on my face?
While you can, body formulas can sometimes feel too heavy for the delicate skin on your face. We highly recommend using our dedicated Tanning Drops mixed with your daily facial moisturizer for a lightweight, customizable glow.
How do I keep my tan from fading unevenly?
Hydration is everything. Moisturize daily with a gentle, oil-free lotion, avoid super hot showers, and skip harsh body washes or physical scrubs until you are ready to prep for your next application.
Conclusion
At 3VERYBODY, we believe that sunless tanning should be simple, inclusive, and comfortable. You do not need a complicated 10-step routine or heavy, sticky foams to get a beautiful, natural-looking glow. By taking a few minutes to prep your skin, using a quality mitt, and choosing lightweight, water-based formulas, you can easily achieve an even tan at home.
If you are ready to skip the guesswork and get everything you need in one place, we highly recommend The Kit. It pairs our sweat-resistant Life Proof Tan with our customizable Tanning Drops and our double-sided Mitt for easy, beautiful results.
Get your glow on your own terms:3VERYBODY Kit