Your Guide to a Flawless At-Home Tan
Self tanner application tips are the difference between a natural-looking glow and a streaky, orange disaster. Here are the essentials for streak-free results:
Quick Self Tanner Application Tips:
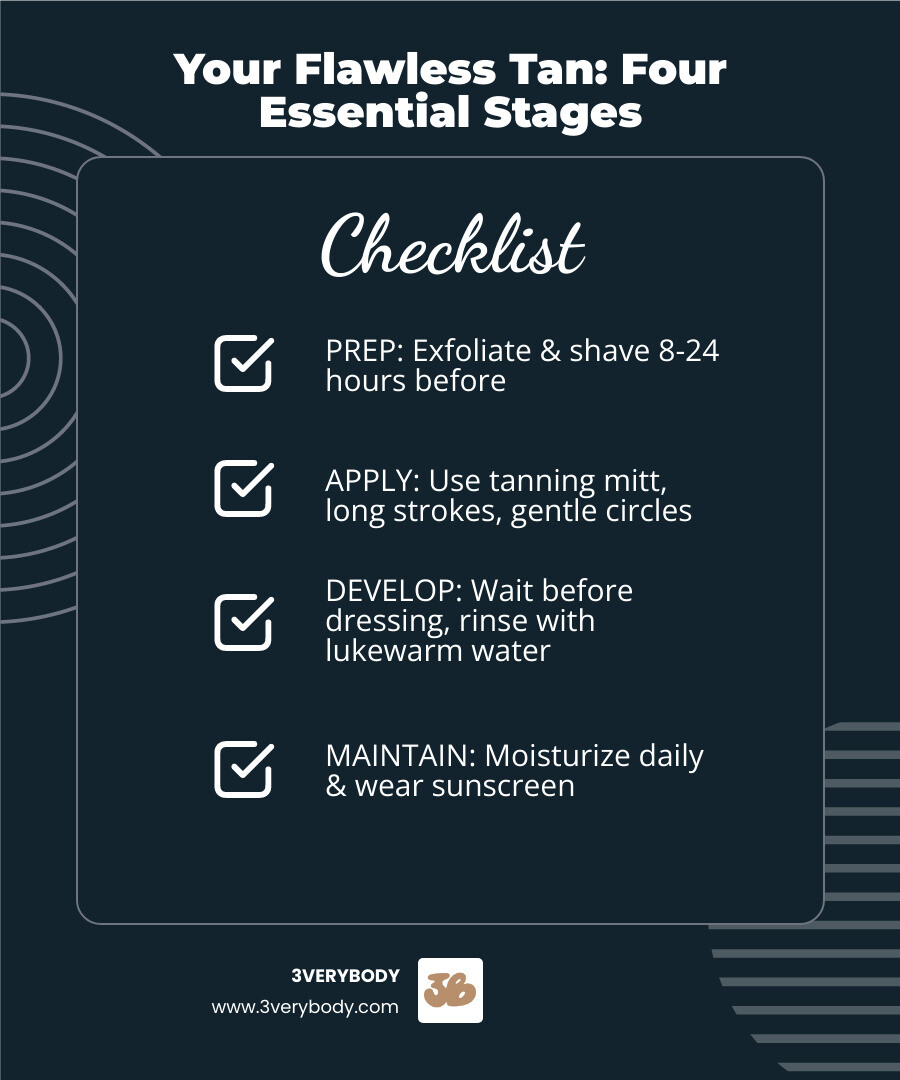
- Prep: Exfoliate 8-24 hours before, shave 24 hours ahead
- Apply: Use a tanning mitt, work in long strokes with gentle circles
- Timing: Leave hands and feet for last, use leftover product only
- Dry: Wait a few minutes before dressing, wear loose clothes
- Rinse: Quick lukewarm water rinse later, no soap
- Maintain: Moisturize daily to extend your tan
The truth? Most self-tanning fails happen because of poor technique, not bad products. Whether you're dealing with streaks, orange tones, or patches that fade too fast, the right application method fixes everything.
A water-light formula like tinted tanning water blends cleaner than thick mousses, dries faster, and looks natural on every skin tone from very fair to deep. When paired with proper prep and the right mitt technique, you get salon-quality results at home—no stickiness, no transfer, no regrets.
I'm Emmybre, founder of 3VERYBODY, and I've spent over a decade testing every self-tanner on the market before creating our Life Proof Tan formula. After watching my mom and grandma battle skin cancer, I became obsessed with perfecting self tanner application tips that deliver a flawless, safe glow every time.

The Pre-Tan Prep: Your Foundation for a Flawless Glow
Your skin is like a canvas—and just like any masterpiece, the prep work makes all the difference. Get this part right, and you're already halfway to that natural, streak-free glow you're after.
Let's start with the timing. Hair removal comes first—shave or wax at least 24 hours before you plan to tan. I know it seems like overkill, but here's why it matters: fresh hair removal leaves your pores wide open, and self-tanner loves to settle into those little openings. The result? Dark spots and that dreaded "strawberry skin" look. Give your skin a full day to calm down and those pores will close up nicely.
Next up is exfoliation—honestly, this is where most people either nail it or completely mess up their tan before they even start. You want to exfoliate 8-24 hours before applying your tinted tanning water. Use an exfoliating glove with an oil-free scrub and really focus on those thicker skin areas like your elbows, knees, and ankles. These spots love to grab onto color and go darker than the rest of you.

That 8-24 hour window isn't random either—it gives your skin's pH time to balance out, which helps the color develop evenly and prevents any weird green undertones. For the full breakdown on getting your skin perfectly prepped, check out our guide on Best Practices for Prepping Your Skin Before Applying Self-Tanner.
On application day, skip the oils, perfumes, and deodorant. These create a barrier that stops your tanning water from absorbing properly, leading to patchy, uneven results. If you absolutely need deodorant because you're naturally sweaty, go ahead—just know you might see a temporary green tint that'll wash right off with your first shower.
Here's where self tanner application tips get specific: while you want most of your skin completely clean and dry, there's one smart exception. Moisturize only your dry spots—knees, elbows, ankles, and knuckles. These areas are like sponges for self-tanner and will go much darker than everywhere else without a little barrier. A light layer of moisturizer on just these spots helps the color blend seamlessly.
Wondering exactly when and where to moisturize? We've got you covered with Should You Moisturize Before Self-Tanning?.
Get your prep right, and you're setting yourself up for that water-light, natural-looking glow that develops evenly and lasts for days. Trust me—these few extra steps make the difference between "wow, you look amazing" and "did you use self-tanner?"
Choosing Your Glow: Why Tinted Tanning Water Wins
Not all self-tanners are created equal. Walk down any beauty aisle and you'll see thick mousses, sticky lotions, and foamy formulas that promise the world but often deliver streaky, orange results. At 3VERYBODY, we took a different approach: water-light formulas that actually work.
Our tinted tanning water and tanning drops aren't just easier to apply—they're designed to give you those self tanner application tips results you've been chasing. A thinner, water-light layer blends cleaner, dries faster, and looks natural from very fair to deep skin.
Here's how our star products stack up:
| Feature | 3VERYBODY Life Proof Tan (Tinted Tanning Water) | 3VERYBODY Tanning Drops |
|---|---|---|
| Use Case | Full body application, quick glow | Customizable facial and body tan, subtle build |
| Application | Spritz onto mitt, apply in long strokes | Mix with moisturizer, serum, or oil |
| Key Ingredients | Argan oil, cucumber oil, caffeine, guarana | Rosehip oil, cucumber extract |
Our Life Proof Tan is exactly what it sounds like—a tan that keeps up with your actual life. This tinted tanning water is quick-dry and sweat/transfer-resistant, so you can work out, sleep in white sheets, and hug people without leaving evidence behind. We've enriched it with argan oil and cucumber oil for hydration, plus caffeine and guarana extract because your skin deserves that little energy boost too.
The best part? It's never orange. Ever. We're talking natural-looking color that works on every skin tone, and it's vegan, cruelty-free, and free from parabens and sulfates. If you're curious about this game-changing formula, check out What is a Self-Tanning Water?.
For your face and anywhere you want complete control over your color, our Tanning Drops are pure magic. Mix a few drops with your favorite moisturizer, serum, or oil, and you get exactly the shade you want. These drops feature rosehip oil and cucumber extract for that nourishing glow, and like everything we make, they're vegan and free from parabens, palm oil, and sulfates. Master the technique with our guide on How to Apply Self-Tanning Drops.
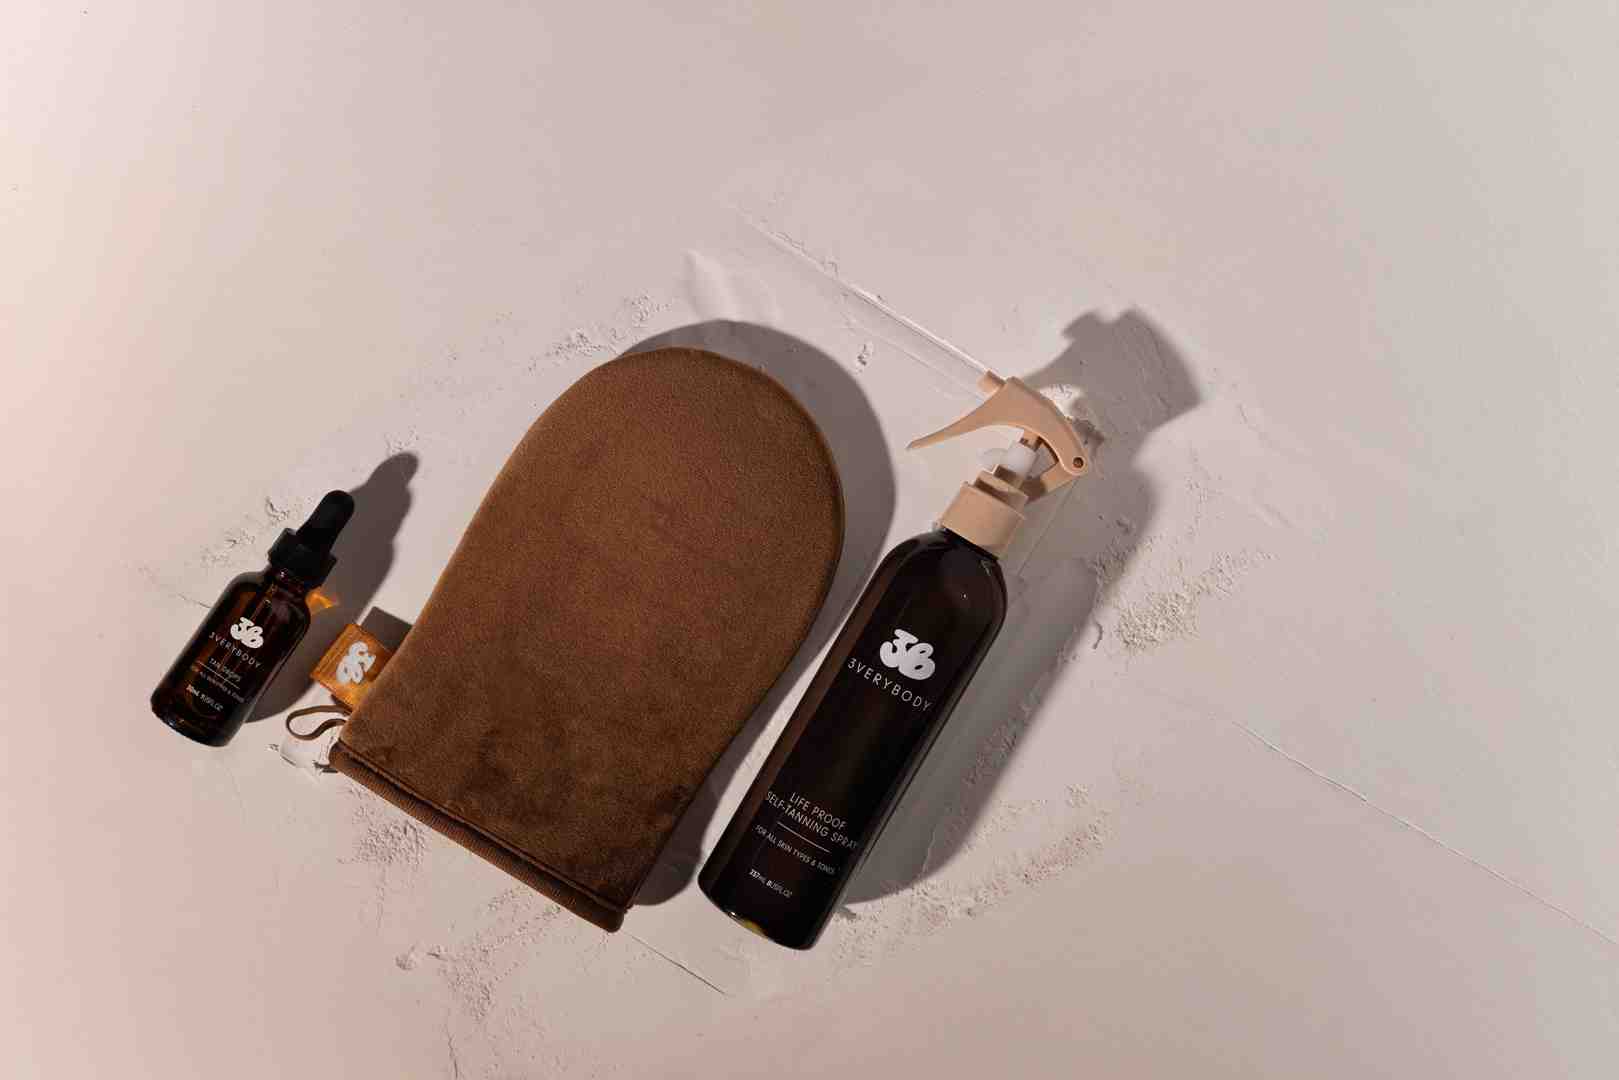
Want the full experience? The 3VERYBODY Kit brings together our Life Proof Tan, Tanning Drops, and our streak-free Double-Sided Tanning Mitt. It's everything you need for salon-quality results at home—no appointments, no awkward positioning, just you and a flawless tan.
The Main Event: Your Step-by-Step Guide to a Streak-Free Application
This is it—the moment where all your prep work pays off. With the right self tanner application tips and our water-light Life Proof Tan, you're about to create that perfect, natural-looking glow. No orange tones, no streaks, just beautiful color that looks like you spent the weekend somewhere sunny.
The secret to flawless results? It's all about technique and having the right tools. Our tinted tanning water blends so much cleaner than thick mousses because that thinner, water-light layer spreads evenly and dries fast. When you pair it with proper application methods, you get salon-quality results every single time.
Essential Tools for a Perfect Finish
Let's be honest—attempting to apply self-tanner without a proper mitt is like trying to paint a masterpiece with a house brush. You absolutely need the right tool for streak-free control and to avoid those tell-tale orange palms that scream "fake tan." Do I Need to Use a Tanning Mitt to Apply Self-Tanner? The answer is a resounding yes.
Our 3VERYBODY Double-Sided Tanning Mitt was designed specifically for even application. The soft, velvet-like surface grabs just the right amount of product and distributes it smoothly across your skin. Plus, it's completely washable and reusable—much better for your wallet and the environment than disposable alternatives.
After each tanning session, give your mitt a thorough clean to prevent any buildup that could cause splotchy results next time. A clean mitt is a streak-free mitt. Check out our guide on How to Clean Your Tanning Mitt to keep it in perfect condition.
Applying to Your Body: The Best Self Tanner Application Tips
Now for the fun part. Find a cool, dry spot in your home—excess heat and humidity can interfere with how the tanner develops. Start from your ankles and work your way up your body. This prevents you from accidentally brushing against freshly tanned areas and creating smudges.
Spritz a light amount of our Life Proof Tan directly onto your mitt. Our formula is concentrated, so a little truly goes a long way. Too much product can actually cause streaking, so start conservatively.
Work in sections using long, sweeping strokes followed by gentle circular motions to blend everything seamlessly. The key is maintaining that fluid motion—no stopping and starting, which can create lines. Our water-light formula makes this so much easier because it doesn't dry sticky or tacky like heavier formulas.
If you accidentally apply too much in one area, don't panic. Simply rub the excess into a larger surface area like your stomach or back. The beauty of our tinted formula is that you can see exactly where you've applied it, making it nearly impossible to miss spots.
For your back, you have a few creative options. Ask a friend for help, use a back applicator, or try the spatula trick—fasten your mitt to a clean spatula handle with a hair tie for extended reach. You can also fill a small spray bottle with tanner for easy application on those upper back areas.
The most important self tanner application tips for avoiding streaks? Keep moving, blend thoroughly, and trust the process. For more detailed guidance on common pitfalls, read How to Avoid Streaks or Patchiness When Applying Self-Tanner.
Mastering Tricky Areas: Hands, Feet, Elbows & Knees
These areas can make or break your tan, but they're totally manageable with the right approach. Since you moisturized these dry spots during prep, they're ready for a light touch with leftover product only.
Always save hands and feet for last. Use only whatever product remains on your mitt after tanning your arms and legs. Make a "claw" shape with your hands to stretch the skin over your knuckles, then gently sweep the mitt over the tops of your hands and feet. Don't forget the webbing between your fingers and toes.
Immediately after application, buff with the clean, dry side of your mitt, then wipe your palms, fingernails, and cuticles clean. This prevents that dead giveaway orange staining that screams amateur application.
For elbows and knees, bend these joints slightly during application to stretch the skin and prevent pooling in creases. Again, use only residual product from your mitt. If you notice any darkness building up, gently buff it out with the clean side of your mitt or a slightly damp cloth.
Tanning Your Face & Neck: The Ultimate Self Tanner Application Tips
Your face deserves special treatment, which is why we recommend switching to our 3VERYBODY Tanning Drops for this delicate area. Instead of applying full-strength tanner, you'll mix these drops with your favorite moisturizer, serum, or facial oil for complete control over your color intensity. Can I Use Self-Tanner on My Face? Absolutely, when you do it right.
Start with 1-2 drops mixed into your regular facial product—you can always add more tomorrow. Apply this mixture evenly across your face and neck, paying special attention to blending into your hairline and jawline. This prevents harsh lines that look unnatural.
If you have light eyebrows, protect them with a thin layer of petroleum jelly or aloe vera gel applied with a clean spoolie brush. This prevents unwanted darkening that can look artificial.
Always start light and build color over several applications rather than going deep on day one. This gradual approach ensures a natural-looking progression that mimics how your skin would actually tan from the sun. Your face is the first thing people see, so it's worth taking your time to get it perfect.
The Afterglow: Making Your Tan Last and Fixing Mistakes
You've nailed the application—now let's lock in that gorgeous color and keep it looking fresh for days. The good news? Our Life Proof Tan makes this part surprisingly easy.
The Waiting Game: Drying, Dressing, and Rinsing
Here's where our quick-dry formula really shines. While other self-tanners leave you standing around sticky and worried about transfer, Life Proof Tan dries in just minutes. But even with our fast-absorbing formula, a little patience goes a long way.
Wait before dressing—give it at least 10 minutes to fully absorb. Then wear loose, dark clothes for the next few hours. Think oversized tees and comfy joggers rather than your favorite white jeans. The beauty of our sheet-safe formula is that you can even apply at night and sleep peacefully without staining your bedding.
When it's time for your first rinse (usually 4-8 hours later), keep it simple. Take a quick lukewarm shower and resist the urge to scrub. No soap, no body wash, no loofah—just gentle water to wash away the cosmetic bronzer and reveal your developed tan underneath. Pat your skin dry with a towel instead of rubbing to protect that fresh glow.
For the complete scoop on timing your first shower, check out How Long Should I Wait to Shower After Applying Self-Tanner?.
Making It Last: Tan Maintenance 101
The secret to a long-lasting tan isn't complicated—it's all about moisturizing daily. Well-hydrated skin holds onto color longer and fades more evenly. I recommend moisturizing at least once daily, ideally twice if you have naturally dry skin.
Avoid hot tubs and chlorine pools when possible, as both can strip your tan faster than you'd like. If you do take a dip, moisturize immediately afterward to help repair any damage.
After a few days, as your tan naturally starts to fade, gentle exfoliation helps it fade evenly rather than in patches. But skip the harsh scrubs—a soft washcloth is plenty.
Here's something crucial: always wear sunscreen. Self-tanner gives you color, not protection. Even our gorgeous bronze glow won't shield you from UV damage, so stick with broad-spectrum SPF 30 or higher daily. Dermatologists can't stress this enough—check out their advice on sun protection for the full story.
Want to dive deeper into tan longevity? Our guide on How Can I Make My Self-Tan Last Longer? has all the insider tricks.
Oops! How to Fix Common Mistakes & Remove Old Tan
Even with perfect self tanner application tips, sometimes things don't go exactly as planned. Don't panic—most mistakes are totally fixable.
Fix streaks by dabbing a cotton pad with lemon juice on the problem area. Let it sit for a few minutes, then gently buff with a damp cloth. The natural acidity helps lighten concentrated spots without harsh chemicals.
Buff dark patches on elbows, knees, or ankles with a warm, damp washcloth. You can also apply regular moisturizer to dilute overly dark areas—it works surprisingly well.
When you're ready for a fresh start, exfoliate to remove old tan. Use an exfoliating scrub with warm water in the shower to buff away lingering color. This creates a clean, smooth canvas for your next application, ensuring your new tan goes on evenly without any patchiness from leftover color.
For a complete rundown of common pitfalls and how to avoid them, check out our Tips for Avoiding Common Self-Tanning Mistakes.
Frequently Asked Questions about Self-Tanning
Let's tackle the questions we hear most often about self tanner application tips and self-tanning in general. These are the real concerns that keep people from getting their perfect glow—and I want to put your mind at ease.
Will self-tanner stain my clothes or sheets?
This is honestly the number one worry I hear, and I totally get it! Nobody wants to ruin their favorite white sheets or that cute new top. The good news? Our Life Proof Tan is specifically formulated to be transfer-resistant and sheet-safe. It's quick-dry technology means you're not walking around sticky for hours, and once it sets, you can sleep soundly without leaving bronze streaks on your pillowcase.
That said, I still recommend giving it a few minutes to dry completely and throwing on some loose, dark clothes during the development phase—just to be extra safe. But honestly, with our water-light formula, staining is rarely an issue. For the full scoop on protecting your fabrics, check out Will Self-Tanner Stain My Clothes or Sheets?.
Why do some self-tanners smell bad?
Ah, the dreaded "fake tan smell"—that biscuity, almost metallic scent that screams "I used self-tanner!" This happens when DHA (the active tanning ingredient) reacts with amino acids on your skin. It's totally normal, but some formulas are way worse than others.
When I was developing our products, eliminating that tell-tale smell was a huge priority. We use high-quality, scent-free formulas that dramatically reduce or completely eliminate that unpleasant odor. You shouldn't have to choose between a great tan and smelling good! Want to know more about this common issue? Read Why Do Self-Tanners Smell Funny?.
Is self-tanning a safe alternative to sun tanning?
This question is actually why I started 3VERYBODY in the first place. After watching my mom and grandma battle skin cancer, I became passionate about finding safer ways to get that gorgeous, bronzed glow we all love.
Self-tanning is absolutely a safe alternative to sun exposure. Dermatologists consistently recommend self-tanners as a UV-free way to achieve beautiful color without the cancer risk that comes with traditional tanning. You get all the confidence and glow of a sun-kissed look with zero of the DNA damage.
Our formulas are designed to work with your skin's natural chemistry, giving you that perfect bronze without any harmful rays. It's honestly one of the best beauty innovations out there—a way to look and feel amazing while actually protecting your health. For a deeper dive into self-tanning safety, explore Is Self-Tanning Safe?.
Your Flawless, Feel-Good Glow Awaits
You now have everything you need for a perfect, natural-looking tan at home—and it all comes down to three simple things: proper prep, the right technique, and a water-light formula that actually works. No more guessing games, no more orange disasters, no more sticky mess that ruins your sheets.
The truth is, most self-tanning fails aren't about the products—they're about the method. When you exfoliate properly, use a quality mitt, and apply in long strokes with gentle circles, even a basic self-tanner performs better. But when you pair these proven self tanner application tips with our Life Proof Tan's quick-dry, transfer-resistant formula, you get something special: a streak-free, sweat-proof tan that looks natural on every skin tone from very fair to deep.
As a woman-owned, inclusivity-first brand (and yes, creator-approved by HopeScope!), we built 3VERYBODY around one simple belief: everyone deserves to feel confident and radiant in their own skin. That's why our Life Proof Tan is sweat-proof and sheet-safe, enriched with nourishing argan oil and cucumber oil, and formulated to never, ever turn you orange.
Whether you choose our Tinted Tanning Water for full-body glow, Tanning Drops for customizable color, or grab our complete 3VERYBODY Kit for the full experience, you're getting vegan, cruelty-free formulas free from parabens and sulfates. No compromises, no unpleasant surprises—just the easiest, most natural-looking tan you've ever had.
Your flawless, feel-good glow is waiting. Find our Life Proof Tan, Tanning Drops, Mitt, and Kit and start your journey to streak-free confidence today.


