Your Guide to a Flawless, Sunless Glow
Exfoliate before self tan is the single most important step for achieving a streak-free, natural-looking glow that actually lasts. Here's what you need to know:
Quick Answer:
- When: 24-48 hours before self-tanning
- How: Use gentle, oil-free scrubs in circular motions
- Focus areas: Elbows, knees, ankles, and feet
- Why: Removes dead skin cells for even color and longer wear
- Skip: Exfoliating within 4 hours of tanning (keeps pores open)
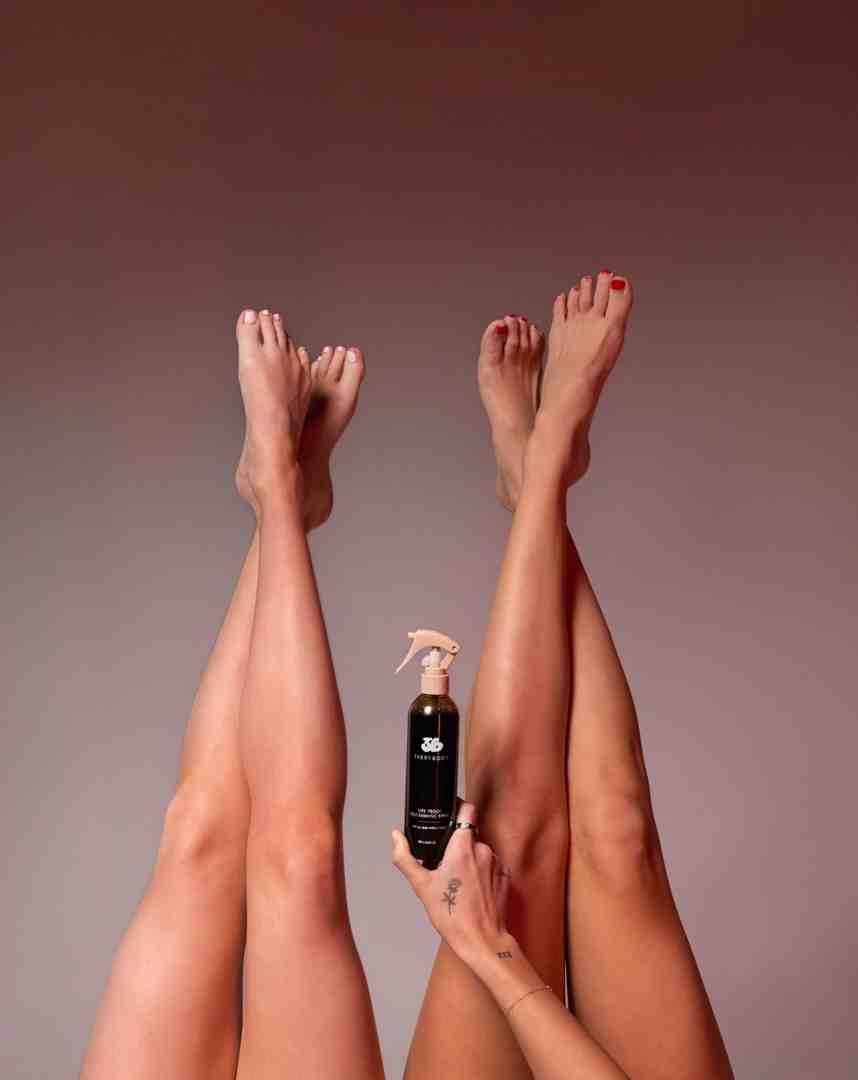
I've been testing self-tanners for over a decade, and here's what I learned the hard way: no amount of expensive product can fix poor prep. When I was developing 3VERYBODY in my apartment kitchen, I tested dozens of formulas on unexfoliated skin. Every single one turned out patchy, streaky, or faded within days.
The science is simple. Self-tanners contain DHA (dihydroxyacetone), which reacts with amino acids in your skin's outermost layer. If that layer is covered in dead, flaky cells, your tan clings to those instead of fresh, healthy skin. The result? Uneven color that peels off as those dead cells naturally shed.
Proper exfoliation can extend your tan's life by several days and prevents those dreaded dark patches on elbows and knees. But timing matters just as much as technique.
I'm Emmybre, founder of 3VERYBODY, and I've spent years perfecting the art of exfoliate before self tan after watching my mom and grandma battle skin cancer from sun exposure. Through countless tests and formula tweaks, I've learned that the perfect tan starts 24 hours before you even touch the bottle.

The Simple Science Behind a Perfect Tan
Here's the truth: there's no such thing as a "safe" base tan. Harvard Medical School confirms that any tan from UV rays is actually your skin crying for help, sending pigmented cells to the surface as a desperate defense mechanism. That "healthy glow" comes with serious long-term damage.
Self-tanning gives you all the confidence of bronzed skin without any of the risk. But here's what separates a gorgeous, natural-looking tan from an obvious fake one: proper exfoliation.
When you exfoliate before self tan, you're removing dead skin cells that would otherwise create an uneven surface. Think of it like this - you wouldn't paint over peeling wallpaper, right? Your skin needs that same smooth foundation.
Self-tanners work through a simple chemical reaction. The active ingredient, dihydroxyacetone (DHA), reacts with amino acids in your skin's outermost layer. When that layer is fresh and healthy thanks to exfoliation, you get even color that fades naturally. Skip the prep work, and the DHA clings to dead, flaky cells that are already on their way out.
I learned this lesson the hard way during my early 3VERYBODY testing days. No matter how perfect I made the formula, it looked patchy on unexfoliated skin. The science doesn't lie - exfoliation is the foundation of every great tan.
For a deeper dive into why this step matters so much, check out our detailed guide on The Importance of Exfoliation in Self-Tanning Routines.
What Happens If You Skip This Step?
We've all seen those self-tanning disasters on social media. The streaky legs, the orange knees, the patchy fade that screams "fake tan." Here's the thing - most of these problems come from skipping exfoliation.
When dead skin cells build up, your self-tanner has nowhere to go but onto that flaky surface. Dry areas like knees and elbows absorb way more product, creating those telltale dark patches. Meanwhile, smoother areas barely take any color at all.
Your pores can also get clogged with old product and dead skin, leading to an uneven texture that no amount of blending can fix. The tan literally clings to dry spots while sliding right off smoother areas.
But here's what really hurts - faster, uneven fading. Since you've essentially painted over cells that are ready to shed, your beautiful color disappears in patches within days. You end up looking like you're molting instead of glowing.
And let's talk about wasted product. Good self-tanners aren't cheap, and when your tan looks terrible or fades immediately, you're literally washing money down the drain. Trust me, the few extra minutes spent exfoliating will save you time, frustration, and cash in the long run.
A Gentler Touch: Exfoliating Your Face vs. Body
Your facial skin is completely different from the skin on your body. It's thinner, more sensitive, and actually renews itself faster. This means you need a totally different approach when you exfoliate before self-tanning.
For your body, you can go stronger. Sugar scrubs, salt scrubs, and exfoliating mitts work beautifully on areas like legs, arms, and your torso. These tougher areas can handle more aggressive exfoliation without irritation.
Your face needs babying. Harsh body scrubs can cause micro-tears or irritation that'll make your facial tan look angry instead of gorgeous. Stick to gentle, cream-based scrubs with fine particles, or use a soft washcloth with your regular cleanser.
I always tell people to use different products for face and body exfoliation. What works on your legs might be way too intense for your delicate facial skin. Avoiding irritation is key - red, sensitive skin won't take self-tanner evenly, no matter how perfectly you apply it.
The goal stays the same whether you're prepping your face or body: create that smooth, clean canvas. Just adjust your tools and pressure to match what each area can handle.
Perfect Timing: When and How to Exfoliate Before Self Tan
Here's what I wish someone had told me when I first started experimenting with self-tanners: timing is absolutely everything. The sweet spot to exfoliate before self tan is 24 hours before your application. Not right before, not a week ahead – exactly one day.
I learned this the hard way during my early 3VERYBODY testing days. I'd exfoliate in the morning and tan that same evening, wondering why my legs looked like I had tiny dark dots everywhere. Turns out, I was applying tanner to freshly opened pores and irritated skin.
When you exfoliate, you're essentially giving your skin a mini workout. Your pores open up, blood flow increases slightly, and your skin needs time to recover. That 24-hour window allows your pores to close completely, any redness to calm down, and your skin to settle into its smoothest state.
This recovery time is especially crucial if you've recently shaved or waxed. Hair removal leaves your follicles open and your skin a bit sensitive. Give everything a full day to settle, and you'll avoid that "strawberry legs" effect where tan gets trapped in open hair follicles.
Think of it like preparing for a big event. You wouldn't get a facial the morning of your wedding, right? Your skin needs time to look its absolute best. For more detailed preparation tips, check out our guide on Best Practices for Prepping Your Skin Before Applying Self-Tanner.
Your Step-by-Step Guide to Exfoliate Before Self Tan
The perfect exfoliation session takes about 10 minutes and makes all the difference. Here's exactly how to do it:
Start with a warm shower to soften your skin and open those pores. The steam makes dead skin cells easier to remove and the whole process more effective.
Choose an oil-free scrub or exfoliating mitt – this is crucial. Oil residue will create a barrier that prevents your tanner from absorbing evenly. I prefer sugar scrubs because they dissolve as you use them, reducing the risk of over-scrubbing.
Work in gentle circular motions starting from your feet and moving up. Small circles are key – you're not trying to scrub off a sunburn here. Let the product do the work, not your elbow grease.
Focus extra attention on your ankles, knees, and elbows – these areas naturally accumulate more dead skin and can turn darker if you don't prep them properly. Don't forget your hands and any spots where old tan is clinging.
Rinse completely with warm water. Any leftover scrub particles or residue will interfere with your tan application. I always do a final rinse with slightly cooler water to help close my pores.
Pat dry with a soft towel – never rub. Freshly exfoliated skin is more sensitive, and rubbing can cause irritation or remove the natural oils your skin needs.
Making it Last: Light Exfoliation for an Even Fade
Here's something most people don't know: gentle exfoliation after your tan is just as important as before. Around day 3 or 4, your skin starts its natural cell turnover process. Without a little help, your beautiful tan can fade unevenly, leaving you with patches and an overall dull look.
This isn't the same intensive exfoliation you did before tanning. Think of it more like a gentle polish. Use a soft exfoliating mitt or washcloth with your regular body wash. Focus on areas that tend to fade first – usually your arms and legs – or anywhere the color looks uneven.
This light buffing serves a double purpose. It smooths out any rough patches to help your existing tan fade gracefully, and it removes lingering old tan to prep your skin for the next application. It's like hitting the reset button for consistently gorgeous results.
The key is being gentle. You want to encourage even fading, not scrub your tan off completely. Save the intensive exfoliation for your next full tan prep session.
Your Exfoliation Toolkit: The Best Tools and Methods
Choosing the right tools and methods to exfoliate before self tan is crucial for success. We've experimented with countless options, and here’s what we’ve found works best for a smooth, even base.
| Tool/Method | Effectiveness | Gentleness | Best Use Case for Self-Tanning |
|---|---|---|---|
| Physical Scrubs | High (removes dead skin, smooths texture) | Varies (fine vs. coarse) | Full body exfoliation, focusing on dry areas. Choose oil-free. |
| Chemical Exfoliants | High (dissolves dead skin cells) | Varies (AHAs/BHAs) | Use with caution. Best used days before tanning, not immediately prior, to avoid sensitivity. |
| Exfoliating Mitts/Gloves | High (mechanical buffing) | Moderate | Excellent for targeted exfoliation, removing old tan, and control. |
For our pre-tan prep, we generally lean towards physical exfoliation. It gives us immediate tactile feedback and ensures we're buffing away those dead skin cells without leaving any residue that could interfere with the tan.
- Oil-Free Scrubs: These are fantastic. Look for scrubs with fine granules like sugar or pumice. Sugar scrubs are often gentler and can be hydrating, while pumice offers a bit more grit for tougher areas. The key here is "oil-free." While some sources suggest a little oil might be okay, we find that oil can create a barrier that prevents the self-tanner from fully absorbing, leading to streaks or a lighter tan.
- Exfoliating Mitts or Gloves: These are absolute heroes in our toolkit. They give us incredible control to target specific dry patches like elbows, knees, and ankles. The innovative fabric weave of good quality mitts is gentler than synthetic loofahs, but still highly effective at sweeping away rough patches. Many even have different textures on each side for varied exfoliation intensity.
While chemical exfoliants (like those containing AHAs or BHAs) are amazing for overall skin health, we typically recommend avoiding them in the 24-48 hours directly before self-tanning. They can make your skin more sensitive and potentially disrupt its pH balance, which might affect how the DHA develops. If you do use them, ensure there's ample time between application and tanning.
DIY Scrubs from Your Kitchen
Sometimes, the best solutions are already in our pantry! If you're looking for natural, cost-effective ways to exfoliate before self tan, these DIY scrubs are fantastic options. They use simple ingredients you probably already have, and they're free from harsh chemicals or artificial fragrances.
Here are a few of our favorite recipes:
- Brown Sugar & Coconut Oil Body Scrub: This is a classic for a reason! Brown sugar is a gentle physical exfoliant, and coconut oil provides moisture.
- Ingredients: 1/2 cup brown sugar, 1/4 cup melted coconut oil. (Optional: A few drops of your favorite essential oil like vanilla or lavender for scent.)
- How to Use: Mix ingredients thoroughly. In the shower, apply to damp skin in circular motions, focusing on dry areas. Rinse well.
- Ground Coffee Body Scrub: Coffee is not only a great exfoliant but also contains antioxidants and can help stimulate circulation.
- Ingredients: 1/2 cup used coffee grounds (they're softer than fresh grounds!), 1/4 cup coconut oil or olive oil.
- How to Use: Combine ingredients. Apply to damp skin in the shower, scrubbing gently. Rinse thoroughly.
- Oatmeal Facial Scrub (Gentle): This is perfect for our more delicate facial skin. Oatmeal is incredibly soothing and gently exfoliates.
- Ingredients: 2 tablespoons finely ground rolled oats, 1 tablespoon almond milk (or water), 1 teaspoon honey (optional, for extra hydration).
- How to Use: Mix to form a paste. Gently massage onto a clean, damp face in small circular motions. Rinse with lukewarm water.
Remember to always moisturize after using any scrub, whether store-bought or DIY, to lock in hydration and keep your skin happy.
The Final Prep: Moisturizing Key Spots
After we've exfoliated our skin to perfection, there's one last crucial step before we even think about applying self-tanner: targeted moisturizing. This isn't about slathering lotion all over our body, but rather strategically hydrating specific areas to prevent over-absorption and those tell-tale dark patches.
Our skin tends to be drier and thicker in certain spots – think elbows, knees, ankles, and hands. These areas act like sponges, soaking up more self-tanner than the rest of our body, which can lead to an unnatural, darker appearance. To combat this, we apply a light, oil-free moisturizer to these specific areas right before we apply our self-tanner.
Consider this moisturizer a "barrier cream" for those thirsty spots. It dilutes the self-tanner slightly and creates a subtle barrier, ensuring that the tan develops evenly across our entire body. We also apply a tiny bit to our wrists and the tops of our feet, blending it well.
When choosing a moisturizer for this step, always opt for something light and oil-free. Heavy, oil-based lotions can create too much of a barrier, preventing the tan from developing at all, or leaving a greasy residue that causes streaks. We want hydration, not obstruction! This final bit of care ensures that every part of our body gets that perfect, natural-looking glow.
Common Mistakes to Sidestep for a Perfect Tan
After years of perfecting self-tanning formulas and helping thousands achieve their perfect glow, I've seen the same mistakes pop up again and again. The good news? They're all totally avoidable once you know what to watch for. For more detailed guidance, check out our comprehensive guide on Tips for Avoiding Common Self-Tanning Mistakes.
Over-exfoliating is probably the biggest culprit I see. I get it – if a little exfoliation is good, more must be better, right? Wrong. When you scrub too hard or too often (more than 2-3 times a week), you're actually irritating your skin and leaving it red and angry. Irritated skin doesn't play nice with self-tanner, and you'll end up with an uneven, splotchy result instead of that smooth glow you're after.
Using harsh scrubs is another recipe for disaster. Those big, rough salt scrubs might feel like they're doing more work, but they can create tiny tears in your skin. Think of it like trying to paint on a scratched surface – the self-tanner has nowhere smooth to settle, so it grabs onto those rough spots unevenly.
Here's where I see people mess up the most: forgetting to moisturize dry spots. Your elbows, knees, ankles, and hands are like little sponges just waiting to soak up way too much product. Without that light barrier of oil-free moisturizer, these areas turn dark and screamy "fake tan" instead of blending seamlessly with the rest of your glow.
Using oil-based products before tanning is like putting up a "Do Not Enter" sign for your self-tanner. I learned this lesson the hard way during my early formula testing days. Oils create a film that blocks the DHA from reaching your skin properly, leading to streaks, patches, or areas where the tan just doesn't develop at all. Always check those labels for "oil-free" when you're prepping your skin.
The beauty of avoiding these mistakes is that your skin becomes this perfect, receptive canvas. When I finally got all these steps right, the difference was night and day – smooth, even color that looked completely natural.
Why You Shouldn't Exfoliate Before Self Tan (Right Before, That Is)
I know this sounds contradictory after everything we've covered, but hear me out. While you absolutely must exfoliate before self tan, doing it right before application is actually setting yourself up for failure.
When you exfoliate, you're essentially giving your pores and hair follicles a wake-up call. They open up temporarily, and if you slap self-tanner on immediately, the product settles right into those open spaces. The result? Those dreaded tiny dark dots that create a "strawberry legs" look, or a speckled appearance that's anything but natural.
Your freshly scrubbed skin is also more sensitive than usual. Applying self-tanner to irritated skin can cause stinging or an uneven reaction – neither of which leads to the smooth, comfortable experience we're going for.
Think of that 24-48 hour waiting period as letting your skin take a deep breath and settle back to its happy place. Your pores close naturally, any redness calms down, and your skin's surface becomes perfectly smooth and ready to receive the tanner evenly.
I used to rush this step in my early testing days, thinking I could save time. Every single time, I ended up with uneven absorption and had to start over. Now I plan my tanning sessions like little spa appointments – exfoliate on day one, tan on day two. It's a small wait that makes all the difference between "okay" results and "wow, is that your natural skin?" results.
Frequently Asked Questions
We get tons of questions about the best ways to exfoliate before self tan, and honestly, I love answering them! After years of perfecting our formulas and helping thousands of customers get gorgeous results, these are the questions that come up again and again.
Should you exfoliate before every self-tan application?
Yes, every single time! I know it might seem like extra work, but trust me on this one. When I first started developing 3VERYBODY, I tested what happened when people skipped exfoliation on reapplications. The results were... not pretty.
Here's what happens: even the best self-tan fades unevenly over 5-7 days. Your skin is constantly shedding cells, and bits of old tan cling to rough patches. Without exfoliation, your new tan goes right over this uneven surface, creating darker spots where old tan remains and lighter areas where it's completely gone.
Exfoliating before every application removes that old tan completely, buffs away dead skin, and gives you a fresh, smooth canvas. It's like starting with a clean slate every time. Your tan will look more natural, last longer, and fade evenly when it's time for your next application.
The difference is honestly night and day. For more details on why this step is so crucial, check out our answer to Should you exfoliate before using self-tanner?
What kind of exfoliator is best to use before self-tanning?
The two magic words here are gentle and oil-free. I learned this the hard way when testing our early formulas - harsh scrubs left testers with irritated, blotchy results, while oily products created streaky disasters.
Physical exfoliants work best for pre-tan prep because you can feel exactly what you're removing and control the pressure. Look for scrubs with fine sugar or pumice particles - they're effective but won't scratch your skin. Avoid anything with big, chunky granules or walnut shells that can create tiny tears.
Oil-free formulas are non-negotiable. Even a little oil creates an invisible barrier that prevents DHA from absorbing properly. I've seen beautiful tans turn patchy because someone used a moisturizing body scrub right before application.
Exfoliating mitts are absolute game-changers for control and precision. You can target those tricky dry spots like elbows and knees without over-scrubbing other areas. They're also perfect for removing old tan residue - you can literally see it coming off!
Chemical exfoliants like AHAs and BHAs are amazing for regular skincare, but I recommend using them several days before tanning rather than right before. They can increase skin sensitivity, which isn't ideal when you're about to apply DHA.
Can I shave and exfoliate at the same time?
I totally get why you'd want to knock both out at once - who has time for multiple shower sessions? But separating these steps will give you much better results.
Shave first, then wait. Hair removal leaves your follicles open and your skin slightly irritated, even if you can't see it. When I apply self-tanner to freshly shaved skin, those open follicles grab the DHA and create tiny dark dots. It's not cute.
Give your skin 24 hours to recover after shaving or waxing. This lets those follicles close and any irritation calm down. Then you can exfoliate within that 24-48 hour window before tanning.
If you absolutely must do everything in one session, shave first, then exfoliate very gently afterward. But honestly? The extra day makes such a difference in your final results that it's worth the wait.
Your Smoothest Tan Starts Now
Here's the truth I learned after years of testing formulas and watching countless applications: exfoliate before self tan isn't optional. It's the foundation that makes everything else work.
When I first started 3VERYBODY, I watched friends skip this step and wonder why their expensive self-tanners looked patchy or faded in days. The product wasn't the problem—their prep was. No matter how perfect your self-tanner formula is, it can't overcome dead skin cells, rough patches, or clogged pores.
You now have everything you need to create that smooth, natural glow. The science is simple: DHA needs fresh, even skin to work properly. Your timing matters: that 24-48 hour window gives your skin time to recover from exfoliation. Your technique matters: gentle circular motions and focusing on dry areas prevents those telltale dark patches.
Most importantly, exfoliation is non-negotiable. Every single application should start with this step. It's what separates a professional-looking tan from one that screams "DIY disaster." When you consistently exfoliate before tanning, you're not just removing dead skin—you're creating the perfect canvas for a flawless finish that fades evenly and lasts longer.
The secret to a natural, lasting glow isn't complicated. It's consistent preparation, the right products, and understanding that great tans start 24 hours before you open the bottle.
Ready to put it all together? Get everything you need for a perfect application with the 3VERYBODY Kit. Your streak-free, confidence-boosting tan is just one proper exfoliation away.